BookFreshComponent: Difference between revisions
No edit summary |
No edit summary |
||
| Line 4: | Line 4: | ||
==Where to Find== | ==Where to Find== | ||
This Component can be found in the [[Adding to a Page | "Add | This Component can be found in the [[Adding to a Page | "Add Content to Page"]] section of the [[Toolbar]]. | ||
==Adding to Website== | ==Adding to Website== | ||
Latest revision as of 13:37, 27 March 2014
Bookfresh makes it easy to accept online appointments from new and existing clients. Create a new account by filling in the form, then you can add online booking directly to your website.
Where to Find
This Component can be found in the "Add Content to Page" section of the Toolbar.
Adding to Website
After selecting this Component, you will be able to choose exactly where you want to add it!
You will see all available content locations it can be added to - on the current page only (content locations in Gold), on every page (content locations in Red), or on every page under the current page directory (content locations in Blue. For example - if you are editing a page called "About", the blue content locations would allow you to add this component to all pages under the /about/ directory).
Note
If you do not currently have your BookFresh account configured as a Linked Account, you will be prompted to make this connection after choosing the content location.
Options
You will need to fill in a few details to create a new account and begin accepting appointments.
Enter a valid E-mail Address corresponding to your business, then enter your Business Name to complete configuration.
Some further customization can then be made to add some extra touches before adding this component to your site.
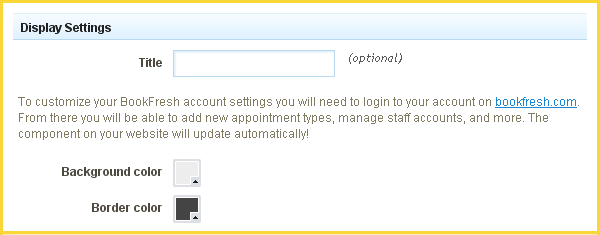
You can optionally set a Title to be displayed above the appointment content on your page. Modifying the Background color and Border color will let you use colors that match your theme.
Editing
Need to make a change? You can access the settings for this Component again by clicking on the "Settings" button on the Component Toolbar.
Example:
An example of this Component can be viewed on the Web Tools page of http://builderexample.com


